The iPad 10th Gen is here, and many people are excited to use it. Are you one of them? Setting up a new device can feel overwhelming, but it doesn’t have to be. Imagine unboxing your shiny new iPad and quickly getting it ready for fun and learning.
Did you know that the iPad 10th Gen has some amazing features? It’s more powerful than ever! You can play games, watch movies, and even create your own art. But first, you need to set it up correctly.
This setup guide will walk you through each step. Whether you are a tech whiz or a beginner, you’ll find easy instructions. Soon, you will be tapping away on your new device, discovering all it has to offer.
Let’s dive in and make sure you get your iPad 10th Gen up and running in no time!

Your Complete iPad 10Th Gen Setup Guide For Beginners
Setting up your iPad 10th Gen is both fun and easy! First, you’ll need to power on the device. A welcoming greeting appears, guiding you through setup steps. Connect to Wi-Fi, sign in with your Apple ID, and customize settings like Face ID. Did you know that your iPad can organize apps for you? Explore different features to make your iPad truly yours. With a few simple steps, you’re ready to dive into a world of apps and entertainment!
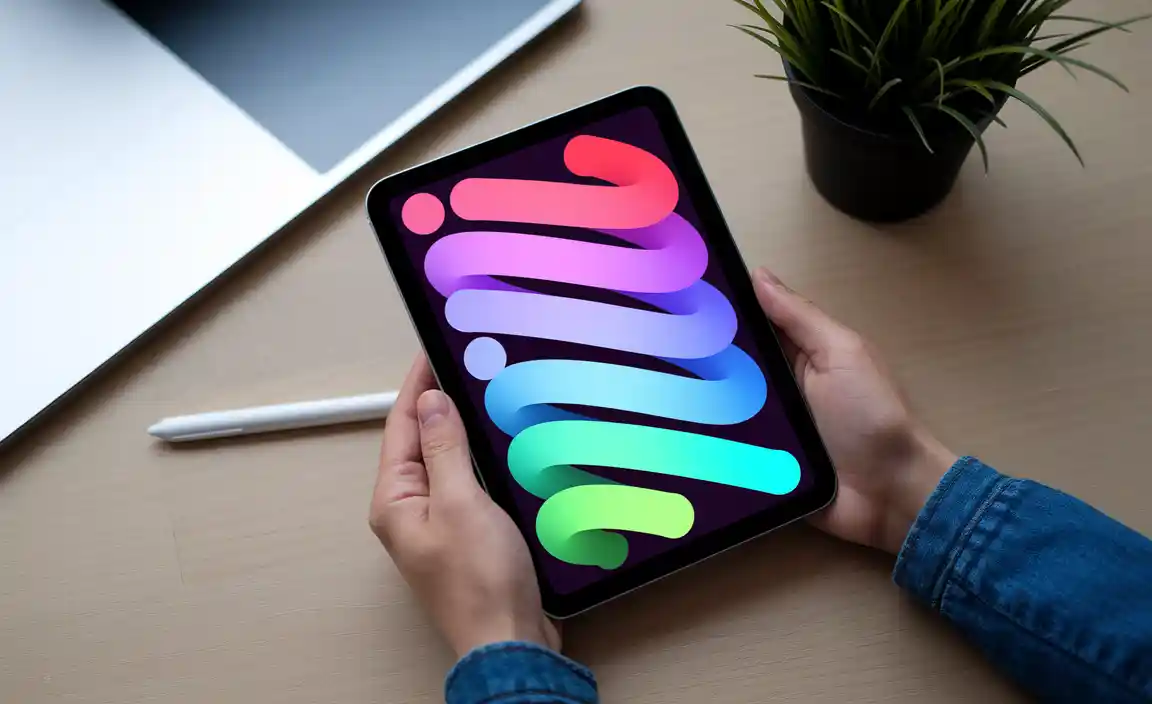
Unboxing Your iPad 10th Gen
What’s included in the box. First impressions of the device design and build.
Opening the box is exciting! Inside, you’ll find:
- The sleek iPad 10th Generation
- A USB-C charging cable
- The power adapter
- Quick start guide
The iPad looks modern and feels sturdy. Its flat edges give it a fresh look, and it is lightweight, making it easy to hold. The vibrant display catches your eye right away. Overall, it’s a blend of style and function that feels nice in your hands.
What are the first impressions of the iPad’s design?
The design is both modern and user-friendly. The iPad’s smooth edges and vibrant colors make it stand out. Kids and adults love its stylish appearance!
Powering On and Initial Setup
How to power on your iPad for the first time. Selecting your preferred language and region.
To power on your shiny new tablet, press and hold the top button. You can’t miss it! Once it lights up, you’ll see a friendly hello waiting for you. Next, pick your favorite language, like English or Spanish (don’t worry, no pressure!). After that, choose your region—think of it as your device’s hometown. Here’s a quick cheat sheet:
| Your Language | Your Region |
|---|---|
| English | United States |
| Español | España |
| Français | France |
Once you’ve made your choices, your iPad will be ready to explore the world. Remember, it’s like picking toppings for a pizza—choose what you love!
Connecting to Wi-Fi
Stepbystep guide to connect to WiFi. Troubleshooting common WiFi issues.
To connect your iPad to WiFi, start by tapping the Settings icon. Then, select “WiFi” and flip the switch on. Your iPad will start searching for networks like a puppy chasing its tail! When you see your WiFi name, tap it and enter your password. If it doesn’t work, check if your WiFi is on and not hiding. Sometimes, just a restart can solve many problems—like magic! If you need extra help, here’s a quick chart:
| Problem | Solution |
|---|---|
| Can’t find your network | Make sure your router is on and not under a pile of laundry! |
| Wrong password | Double-check if you turned your typing fingers into clumsy sausages. |
| Slow connection | Try moving closer to the router; it might be doing the hula dance! |
Setting Up Your Apple ID
Creating a new Apple ID or using an existing one. Understanding the importance of your Apple ID.
Creating your Apple ID is like opening the door to a magical world of apps, music, and photos. You can either make a new one or use an existing account. Your Apple ID is very important because it keeps all your stuff safe and organized. Think of it as your magic key! Plus, if you forget your password, you might as well have lost your treasure map! So, let’s get to it and make that ID!
| Steps to Create Apple ID | Why It’s Important |
|---|---|
| 1. Go to settings | Your ID manages purchases |
| 2. Tap on “Sign in.” | Important for backup |
| 3. Choose “Create new Apple ID.” | Access family sharing |
| 4. Follow the prompts! | Stay connected with friends |
Configuring Touch ID and Passcode
How to set up Touch ID for security. Creating and managing a passcode.
Getting your iPad ready for action? Let’s set up Touch ID and a passcode to keep your device safe! First, place your finger on the home button. The iPad will scan your fingerprint and save it like a treasure map for your digits. You can add different fingers too—for extra sneaky access. Next, let’s make a passcode. It should be easy to remember but hard for others to guess, like your pet’s name but with numbers! Here’s a quick table to help:
| Setting Up | Steps |
|---|---|
| Touch ID | Settings > Touch ID & Passcode > Add a Fingerprint |
| Passcode | Settings > Touch ID & Passcode > Turn Passcode On |
Now you’re all set! Remember, a secure iPad is a happy iPad. After all, it wouldn’t want any uninvited guests!
Transferring Data from Another Device
Methods to transfer data (iCloud, iTunes, direct transfer). Ensuring a smooth transfer process.
Transferring your data to the iPad 10th Gen can be simple. Here are three main methods:
- ICloud: Use iCloud to back up your old device. Then, choose the backup during setup.
- iTunes: Connect your device to a computer with iTunes. Sync your data easily.
- Direct Transfer: With both devices on, follow the prompts to transfer data wirelessly.
Whichever method you choose, ensure both devices are charged. This helps the process go smoothly.
What is the easiest way to transfer data?
The easiest way is using the direct transfer option. You can choose your data and let the devices do the rest.
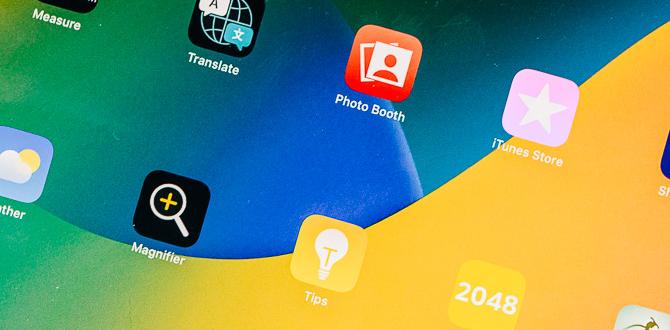
Installing Essential Apps
Recommended apps to download for productivity and entertainment. How to organize apps within folders.
| Recommended Productivity Apps | Recommended Entertainment Apps |
|---|---|
| Google Drive | Netflix |
| Microsoft Office | YouTube |
| Trello | Spotify |
| Evernote | Disney+ |
Now it’s time to sprinkle some fun on your new toy! First, grab the apps that help you with work, like Google Drive and Microsoft Office. Don’t forget to make room for entertainment, too, like Netflix and YouTube. Want to be organized? Create folders! Group your work apps in one folder and your fun apps in another. Your iPad will look like a neat, little library, but with fewer spiders and more cartoons!
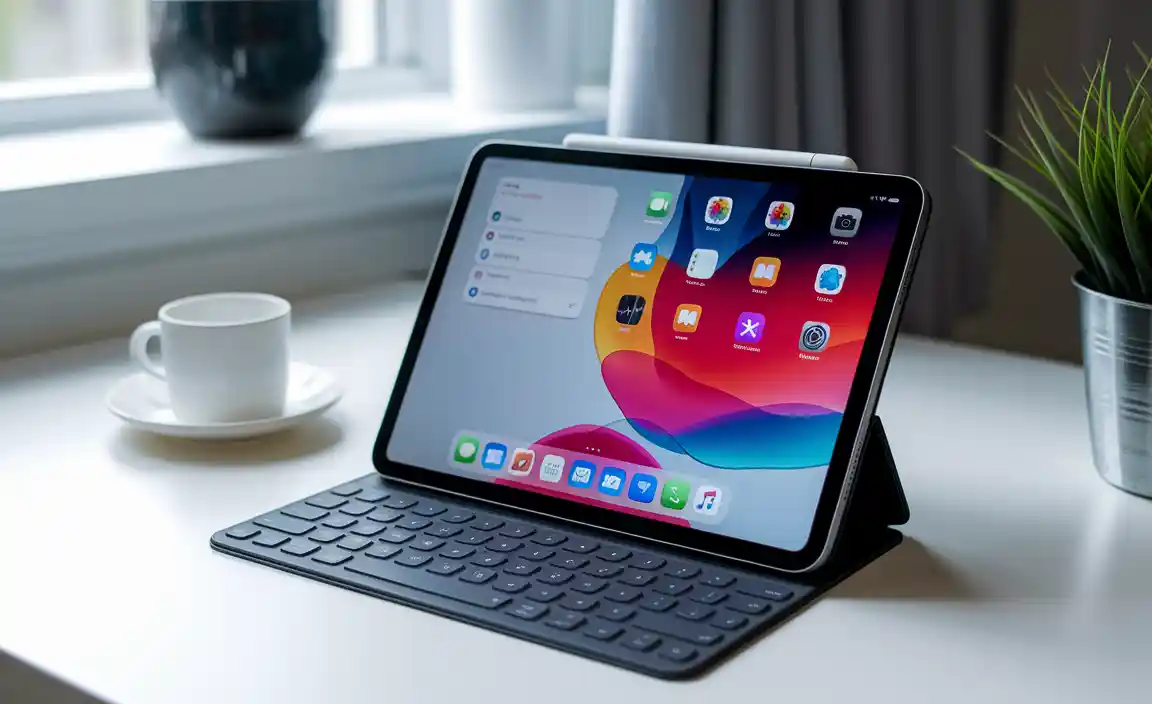
Using the Apple Pencil and Smart Keyboard
Compatibility with accessories. Tips for effectively using the Apple Pencil and Smart Keyboard.
The Apple Pencil and Smart Keyboard enhance your iPad experience. Both accessories are compatible with the iPad 10th gen. They work smoothly together. You can use the Apple Pencil to draw, take notes, or mark up documents. The Smart Keyboard makes typing easy and fun. Here are some tips for using them:
- Hold the Apple Pencil lightly to avoid fatigue.
- Practice writing with it for better accuracy.
- Use the Smart Keyboard on a flat surface for comfort.
- Adjust settings for quick shortcuts that save time.
With these tools, your iPad can become a powerful creative device.
How do I connect the Apple Pencil and Smart Keyboard?
Connect the Smart Keyboard by attaching it to the iPad’s Smart Connector. Pair the Apple Pencil via Bluetooth in Settings.
Understanding iCloud and Backups
How to set up iCloud for storage and backups. Managing iCloud settings for optimal performance.
Setting up iCloud is like giving your iPad a superhero cape! First, you need to go to your settings. Tap your name at the top to access iCloud. To save your photos and apps, make sure iCloud Backup is turned on. It’s like a magic spell that keeps your stuff safe! For the best performance, check your iCloud storage regularly. You wouldn’t want it jammed like a stuffed toy box! Here’s a quick look at iCloud settings:
| Setting | Action |
|---|---|
| iCloud Backup | Turn On |
| Storage Management | Check Regularly |
| Photos | Enable iCloud Photos |
| Apps | Select Which to Backup |
With these simple steps, your iPad will feel like it’s ready to take on the world! So, let’s keep your data safe and sound!
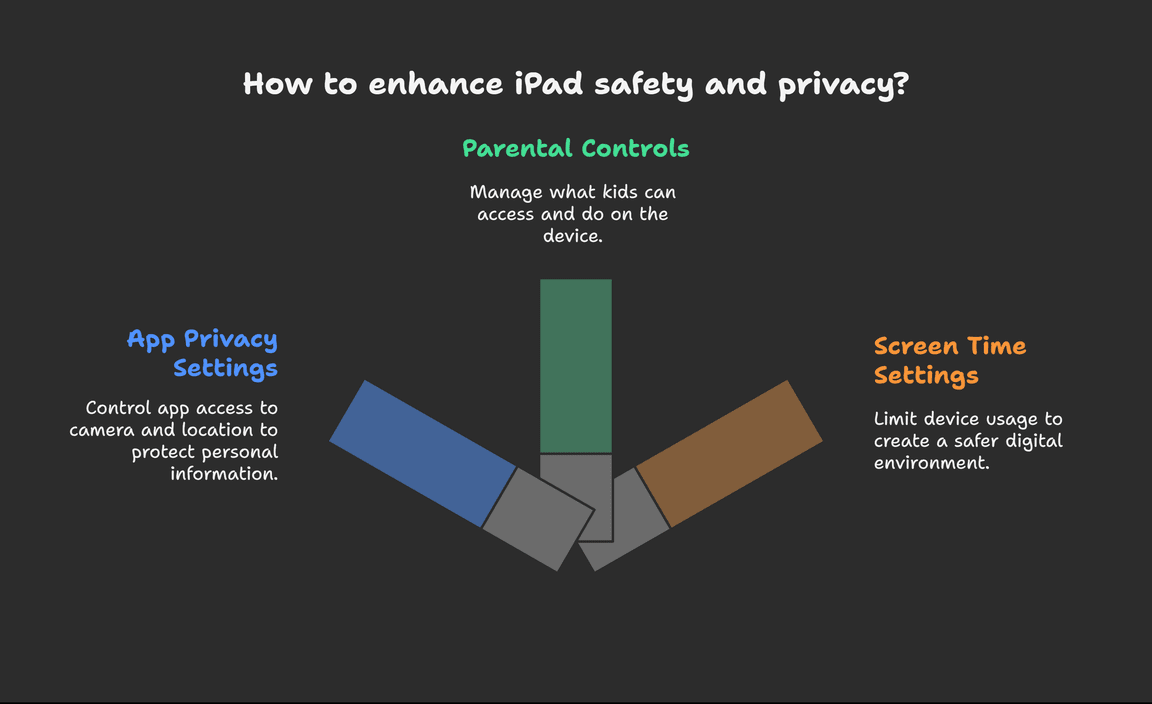
Safety and Privacy Settings
Configuring privacy settings for apps. Understanding parental controls and screen time settings.
Keeping your iPad safe is important. First, check your app privacy settings. Control which apps can access your camera and location. This helps protect your personal information. You can also set up parental controls. This allows you to manage what your kids can see and do on the device. Lastly, use Screen Time settings to limit usage. These tools help create a safer space for everyone.
How can I set up privacy settings for apps?
To set privacy settings for apps, you can follow these steps:
- Go to Settings.
- Tap on Privacy & Security.
- Select Location Services to control app access.
- Adjust settings for camera and microphone access.
What are parental controls and how do I use them?
Parental controls allow you to limit access to apps and content on the iPad. You can set these up under Settings by selecting Screen Time and then Content & Privacy Restrictions.
Conclusion
In conclusion, setting up your iPad 10th generation is easy! Start by turning it on and following the on-screen instructions. Connect to Wi-Fi, sign in with your Apple ID, and customize settings. Explore apps to make the most of your device. For more tips, check Apple’s support pages. Enjoy your new iPad and keep learning!
FAQs
What Are The Initial Steps To Set Up The Ipad 10Th Generation After Unboxing It?
First, take your iPad out of the box and plug it in to charge. Then, press the power button on the side to turn it on. You will see a “Hello” screen. Next, choose your language and country. After that, connect to Wi-Fi by selecting your Wi-Fi network and entering the password. Finally, follow the on-screen instructions to set it up!
How Do I Connect My Ipad 10Th Generation To Wi-Fi During The Setup Process?
To connect your iPad 10th generation to Wi-Fi during setup, turn on your iPad by pressing the button. Once the welcome screen appears, swipe or tap to start. When you see the “Choose a Wi-Fi Network” screen, look for your Wi-Fi name. Tap it and enter the password if needed. Now, you’re ready to use your iPad on Wi-Fi!
What Options Are Available For Transferring Data From My Old Device To The Ipad 10Th Generation?
You can transfer data to your iPad 10th generation in a few ways. First, use Apple’s Quick Start feature; just put your old device near your new iPad. Second, you can connect both devices to a computer and use iTunes or Finder to move your data. Third, you can back up your old device to iCloud and then restore it on your new iPad. Choose the method that feels easiest for you!
How Can I Customize My Ipad 10Th Generation Settings During The Initial Setup?
During the setup of your iPad, you can choose a language and connect to Wi-Fi. You can also set up Face ID or a passcode to keep it safe. Next, you’ll choose what apps and features to use. Finally, you can pick a theme and arrange your icons however you like. Enjoy your new iPad!
What Should I Do If I Encounter Issues During The Setup Of My Ipad 10Th Generation?
If you have problems setting up your iPad 10th generation, first, check your internet connection. Make sure it is strong and working. If it still doesn’t work, restart your iPad by pressing and holding the power button until you see the Apple logo. You can also visit Apple’s website for help or ask an adult to assist you.
Resource
-
Apple Support – Transfer Content: https://support.apple.com/en-us/HT201269
-
Apple ID Creation Help: https://support.apple.com/en-us/HT204316
-
Official Apple iPad User Guide (10th Gen): https://support.apple.com/guide/ipad/welcome/ipados
-
Understanding Screen Time and Parental Controls: https://support.apple.com/en-us/HT201304
{“@context”:”https://schema.org”,”@type”: “FAQPage”,”mainEntity”:[{“@type”: “Question”,”name”: “What Are The Initial Steps To Set Up The Ipad 10Th Generation After Unboxing It? “,”acceptedAnswer”: {“@type”: “Answer”,”text”: “First, take your iPad out of the box and plug it in to charge. Then, press the power button on the side to turn it on. You will see a “Hello” screen. Next, choose your language and country. After that, connect to Wi-Fi by selecting your Wi-Fi network and entering the password. Finally, follow the on-screen instructions to set it up!”}},{“@type”: “Question”,”name”: “How Do I Connect My Ipad 10Th Generation To Wi-Fi During The Setup Process? “,”acceptedAnswer”: {“@type”: “Answer”,”text”: “To connect your iPad 10th generation to Wi-Fi during setup, turn on your iPad by pressing the button. Once the welcome screen appears, swipe or tap to start. When you see the Choose a Wi-Fi Network screen, look for your Wi-Fi name. Tap it and enter the password if needed. Now, you’re ready to use your iPad on Wi-Fi!”}},{“@type”: “Question”,”name”: “What Options Are Available For Transferring Data From My Old Device To The Ipad 10Th Generation? “,”acceptedAnswer”: {“@type”: “Answer”,”text”: “You can transfer data to your iPad 10th generation in a few ways. First, use Apple’s Quick Start feature; just put your old device near your new iPad. Second, you can connect both devices to a computer and use iTunes or Finder to move your data. Third, you can back up your old device to iCloud and then restore it on your new iPad. Choose the method that feels easiest for you!”}},{“@type”: “Question”,”name”: “How Can I Customize My Ipad 10Th Generation Settings During The Initial Setup? “,”acceptedAnswer”: {“@type”: “Answer”,”text”: “During the setup of your iPad, you can choose a language and connect to Wi-Fi. You can also set up Face ID or a passcode to keep it safe. Next, you’ll choose what apps and features to use. Finally, you can pick a theme and arrange your icons however you like. Enjoy your new iPad!”}},{“@type”: “Question”,”name”: “What Should I Do If I Encounter Issues During The Setup Of My Ipad 10Th Generation? “,”acceptedAnswer”: {“@type”: “Answer”,”text”: “If you have problems setting up your iPad 10th generation, first, check your internet connection. Make sure it is strong and working. If it still doesn’t work, restart your iPad by pressing and holding the power button until you see the Apple logo. You can also visit Apple’s website for help or ask an adult to assist you.”}}]}
Your tech guru in Sand City, CA, bringing you the latest insights and tips exclusively on mobile tablets. Dive into the world of sleek devices and stay ahead in the tablet game with my expert guidance. Your go-to source for all things tablet-related – let’s elevate your tech experience!