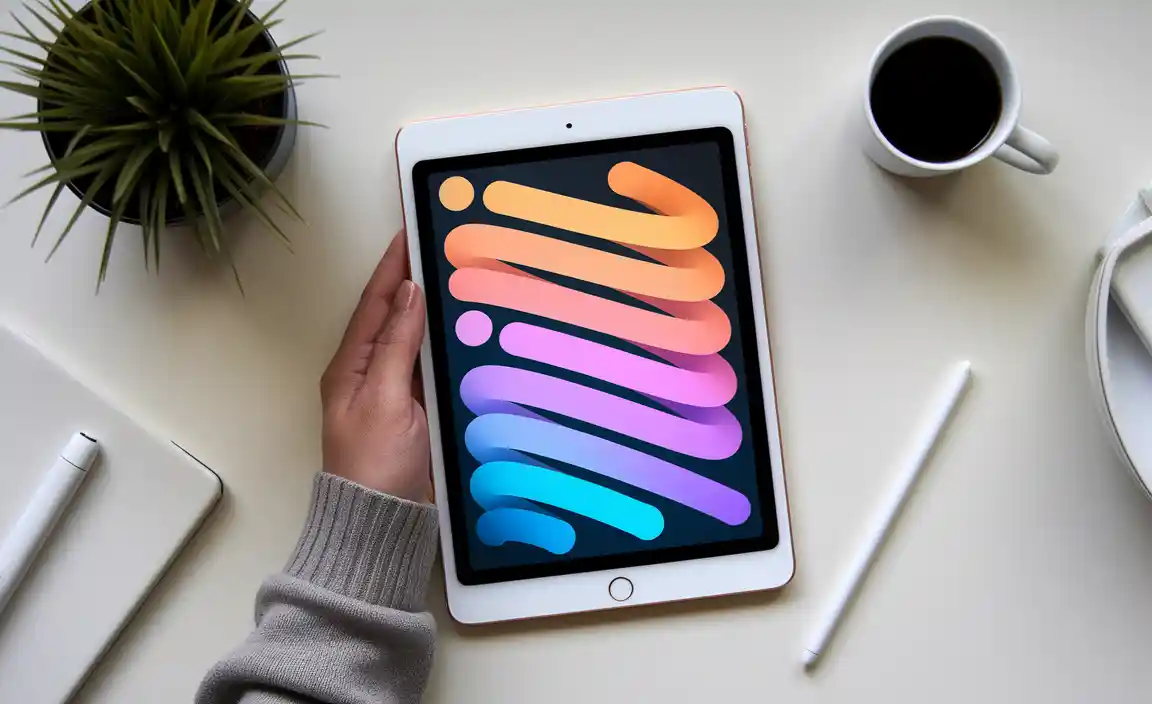
The iPad Air is an incredible device. Have you just bought one? Do you feel a little lost? Don’t worry! Our iPad Air setup guide will help you get started quickly.
Imagine holding a powerful tablet that fits right in your hands. You can play games, watch movies, or draw. It’s like having a magic window to a world of fun and creativity!
But before you dive in, you need to set it up correctly. Setting up your iPad Air might seem tricky, but it’s easier than you think. In this guide, we will walk you through each step.
Did you know that the iPad Air has amazing features? It’s thin, light, and super-fast. Once you set it up, you’ll wonder how you ever managed without it!
Are you ready to unlock your iPad’s potential? Let’s jump into the world of iPad Air setup and start your exciting journey!
Your Ultimate Ipad Air Setup Guide: Quick And Easy Steps
Getting your iPad Air ready is simple! First, unbox and power it on. You’ll see a fun setup screen. Connect to Wi-Fi, and sign in with your Apple ID—this opens up a world of apps and features. Did you know that your iPad can sync with your other Apple devices? Just tap a few buttons to make that happen! Explore settings to personalize your experience. With these steps, you’re ready to enjoy your iPad Air!
Unboxing Your iPad Air
Key components included in the box. Initial inspection and accessories to check.
Opening the box feels like unwrapping a present! Inside, you’ll discover your shiny iPad Air, ready for action. But wait, there’s more! Check out the essential accessories that came along for the ride. You should find a charging cable and a power adapter, perfect for fueling your new gadget. A quick inspection makes sure everything is in place. Now, let’s look at the key parts:
| Item | Description |
|---|---|
| iPad Air | Your new best friend for games and videos! |
| Charging Cable | To give your iPad the juice it needs. |
| Power Adapter | Plug it in, and let the fun begin! |
Before you dive into settings, make sure you have everything. If items are missing, you might end up talking to your mailman instead of exploring your brand-new tech!
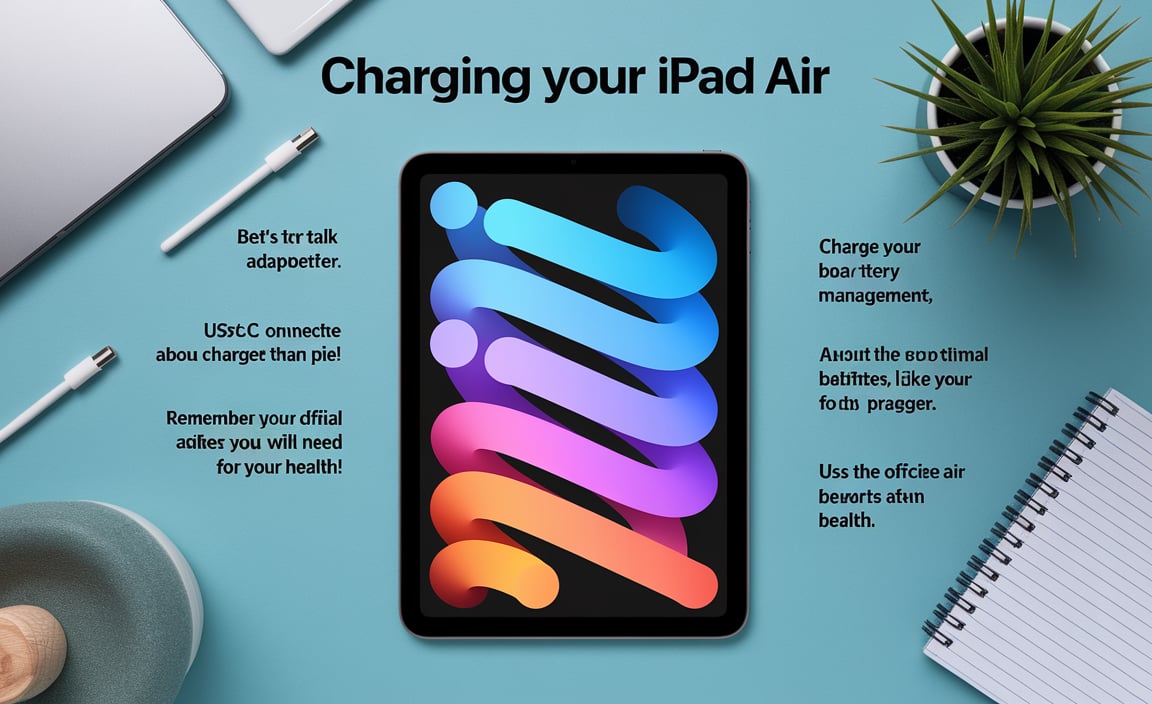
Charging Your iPad Air
Understanding charging ports and adapters. Best practices for battery management. Keeping your iPad Air charged is easier than pie! First, let’s talk about the charging port. It’s a sleek little connector at the bottom. You will need the right adapter, usually a USB-C charger. Remember, using the official adapter is like eating your veggies—much better for your health!
For optimal battery management, charge your device before it hits 20%. You want it to live long and prosper! Try to avoid extreme temperatures, as your iPad isn’t a fan of hot or cold. Charge it up occasionally and your iPad Air will thank you with a happy battery!
| Best Charging Practices | Why It Matters |
|---|---|
| Charge before 20% | Prevents battery stress. |
| Avoid extreme temperatures | Keeps the battery healthy. |
| Use the official adapter | Ensures longevity. |
Powering On and First-Time Setup
Steps to power on your iPad Air. Language and region selection process.
To power on your iPad Air, press the top button until the Apple logo appears. It’s that simple! Next, you’ll see a screen asking you to choose your language and region. This is important. Select your preferred language from the list. Then, pick your region. This helps your iPad work best for you.
What is the first step to setting up my iPad Air?
The first step is to press the top button to turn it on. Then, follow the on-screen instructions to pick your language and region.
Quick Steps:
- Press the top button.
- Select your language.
- Choose your region.
Connecting to Wi-Fi
How to find and select your WiFi network. Troubleshooting common WiFi connection issues.
Finding your WiFi network on the iPad Air is super easy! Go to Settings, then tap on Wi-Fi. A list of available networks will appear. Just select your network and enter the password. Voila! You’re connected!
But wait! If you can’t connect, don’t panic. Try moving closer to the router, or restart your iPad. Sometimes, a good ol’ reboot is all you need. If it’s still playing hard to get, check if your WiFi is turned on or if the router has power. Keep calm and WiFi on!
| Troubleshooting Tips | What to Do |
|---|---|
| Network not showing | Check if your WiFi is turned on. |
| Wrong password | Double-check your password and try again. |
| Slow connection | Move closer to the router. |
Setting Up Your Apple ID
Importance of an Apple ID for your device. Steps on creating or using an existing Apple ID. An Apple ID is key for using your iPad Air. It links your device to the Apple services you love. With it, you can download apps, back up your data, and even shop on iTunes.
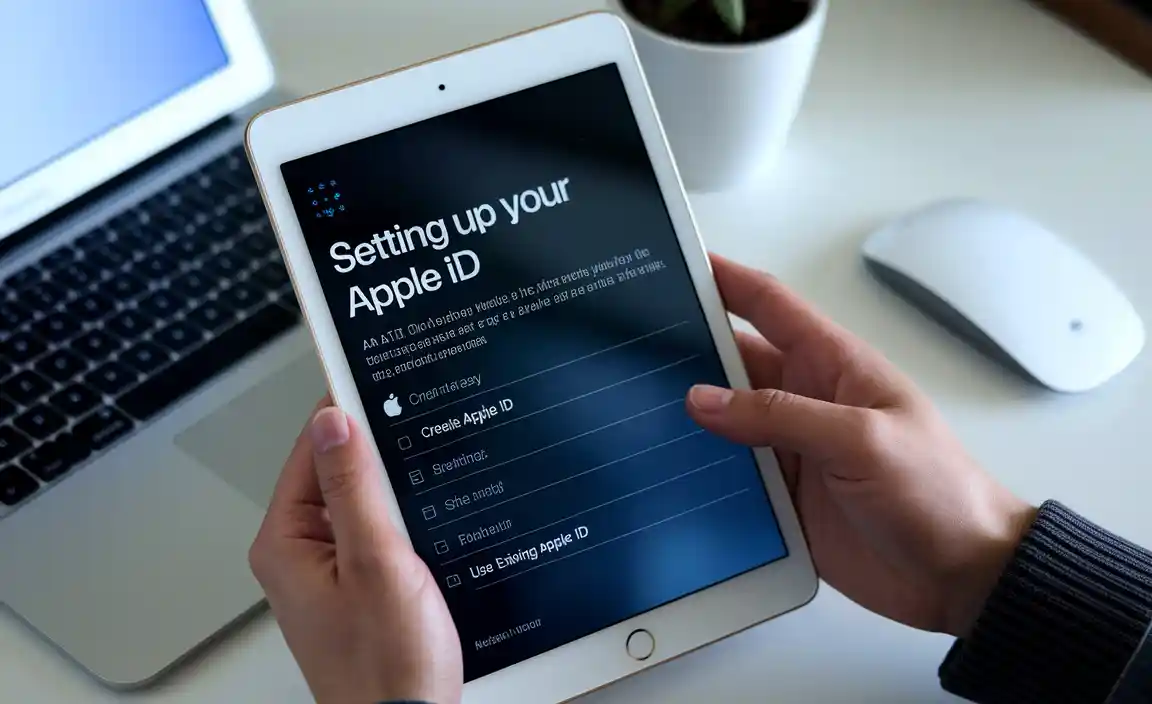
Creating one is easy:
- Open Settings.
- Tap on “Sign in to your iPad.”
- Choose “Create Apple ID” or “Use Existing Apple ID.”
- Follow the simple prompts to finish setting it up.
Having an Apple ID is like having a key to a treasure chest of apps and services!
What do I need for an Apple ID?
You need a valid email address and a password. A phone number is helpful too. Make sure to remember your password!
Customizing Your Home Screen
Organizing apps and folders for efficiency. Setting wallpapers and widgets.
Arranging your apps can make your iPad Air feel just right! Start by grouping similar apps into folders. This way, finding your favorite game or photo editor will be a breeze. Did you know? Studies show that organized spaces can boost productivity by 28%! So, why not slide all your creative apps into one neat folder?
Next, add some personality! Change the wallpaper to something uplifting, like a bright sunset or a funny cat. Don’t forget about widgets! They can show important information at a glance. Imagine having the weather right on your home screen, telling you when to grab an umbrella. You’ll look like a weather guru!
| Tip | Description |
|---|---|
| Group Apps | Put similar apps in folders for easy access. |
| Change Wallpaper | Pick an inspiring or funny image as your background. |
| Use Widgets | Display quick info like weather or news on your screen. |
In no time, your iPad will be both organized and stylish!
Exploring Basic Settings
Adjusting display preferences and accessibility options. Configuring privacy and security settings.
Getting your iPad Air ready is fun and exciting! Start by adjusting display preferences. You can change brightness or apply Night Shift for less strain on your eyes. Don’t forget about accessibility options; features like VoiceOver or larger text can help everyone use the tablet comfortably.
Next, configuring privacy and security is essential. Keep your information safe by setting up a strong passcode. You can also enable Face ID or Touch ID for quick access.
- Adjust brightness for comfort
- Use Night Shift for eye protection
- Set up VoiceOver for better accessibility
- Create a strong passcode for security
- Enable Face ID for easy access
How do I change display preferences on my iPad Air?
To change display preferences, go to Settings > Display & Brightness to adjust brightness. Use Night Shift for warmer colors at night.
Downloading Essential Apps
Recommended apps for productivity and entertainment. How to download and manage apps from the App Store.
Getting the most out of your iPad Air means downloading some cool apps. For productivity, try Notability for taking notes or Trello for managing tasks. Need a break? Plex keeps your movies handy and Spotify plays your favorite tunes.
Downloading from the App Store is simple! Just open the App Store, search for your chosen app, and tap Get. Voila! Managing apps is a breeze too. Swipe to delete what you don’t need anymore. Remember, deleting apps works off-screen too—just like your last bite of broccoli!
| Category | App |
|---|---|
| Productivity | Notability |
| Task Management | Trello |
| Entertainment | Plex, Spotify |
Setting Up iCloud and Backups
Benefits of iCloud for storage and backups. How to configure iCloud settings on your iPad Air. iCloud is a smart way to store your files safely. It keeps your photos, videos, and documents online. This makes them easy to reach from any device. It also helps to back up important data automatically. Here are steps to set up iCloud on your iPad Air:

- Go to Settings.
- Tap on your Apple ID.
- Select iCloud.
- Choose what to back up, like Photos and Files.
- Turn on iCloud Backup.
Now, your iPad Air will save your important stuff without you worrying about it!
What are the benefits of using iCloud?
iCloud offers safe storage, easy sharing, and automatic backups. This means your pictures and documents stay safe and are always with you.
Troubleshooting Common Setup Issues
Identifying and resolving common setup problems. Resources for additional support and guidance.
Setup problems can be frustrating. Sometimes, your iPad Air just won’t connect to Wi-Fi or update. Here are tips to fix common issues:
- Restart your iPad.
- Check your Wi-Fi connection.
- Make sure your software is up to date.
- Reset network settings if needed.
If problems continue, you can visit Apple’s support website. There, you can find guides and videos for extra help. Also, ask friends or family for advice!
What should I do if my iPad Air won’t connect to Wi-Fi?
Try toggling the Wi-Fi off and on first. If that doesn’t work, you may need to reset your network settings. Be sure to restart the iPad after making changes.
Conclusion
In conclusion, the iPad Air setup guide helps you get started easily. You learn to connect to Wi-Fi, set up your Apple ID, and customize settings. Remember to explore apps and features to make your iPad Air truly yours. For more tips, check out user guides or videos online. Enjoy your new device!
FAQs
What Are The First Steps To Power On And Set Up My New Ipad Air?
To start your new iPad Air, first, find the power button. It’s on the top edge of the iPad. Press and hold it until you see the Apple logo. Next, swipe up on the screen. You’ll see instructions to set up your iPad. Follow the steps to choose your language and connect to Wi-Fi.
How Do I Connect My Ipad Air To Wi-Fi During The Setup Process?
To connect your iPad Air to Wi-Fi, turn on your iPad. When you reach the Wi-Fi screen, you’ll see a list of networks. Tap on your Wi-Fi network name. Then, enter the password for the Wi-Fi and tap “Join.” Once you’re connected, you can continue setting up your iPad!
What Options Do I Have For Transferring Data From My Old Device To My New Ipad Air?
You have a few easy ways to move your data. You can use Wi-Fi to set up your new iPad Air. Just follow the on-screen steps. You can also use a cable to connect both devices. Another option is to back up your old device on iCloud and then restore it on your new iPad Air.
How Can I Customize My Ipad Air Settings After The Initial Setup?
To customize your iPad Air settings, go to the “Settings” app. You can change sound, brightness, and wallpaper there. Tap on options like “General” to find more choices. If you want to add apps or change your passwords, you can do that too. Explore the settings to make your iPad just how you like it!
What Should I Do If I Encounter Issues During The Ipad Air Setup Process?
If you have problems setting up your iPad Air, don’t worry. First, try restarting it by pressing and holding the power button. If that doesn’t help, check your Wi-Fi connection. Make sure you’re connected to the internet. You can also read the instructions again or ask an adult for help.
Resource:
- Official Apple iCloud Support: https://support.apple.com/icloud
- How to Set Up Your Apple ID: https://support.apple.com/en-us/HT204316
- Apple Device Battery Best Practices: https://www.apple.com/batteries/maximizing-performance/
Your tech guru in Sand City, CA, bringing you the latest insights and tips exclusively on mobile tablets. Dive into the world of sleek devices and stay ahead in the tablet game with my expert guidance. Your go-to source for all things tablet-related – let’s elevate your tech experience!