RCA Tablet 7 Voyager Screen: Effortless Reading Upgrade! Replace your screen to view books and media with stunning clarity, making every page a joy to behold.
Hey there, fellow gadget enthusiasts! If you’re anything like me, your tablet has become your go-to companion for diving into new books, catching up on articles, or enjoying your favorite digital magazines. But what happens when the screen on your RCA Tablet 7 Voyager starts to act up? We’ve all been there – a cracked display, unresponsive touch, or colors that just aren’t quite right can turn a relaxing reading session into a frustrating ordeal. Don’t worry, though! You don’t need to be a tech wizard to bring your tablet back to its former glory. This guide is designed to make upgrading your RCA Tablet 7 Voyager screen for an enhanced reading experience straightforward and stress-free. We’ll walk through everything you need to know, step-by-step.
RCA Tablet 7 Voyager Screen: Why an Upgrade is Essential for Reading
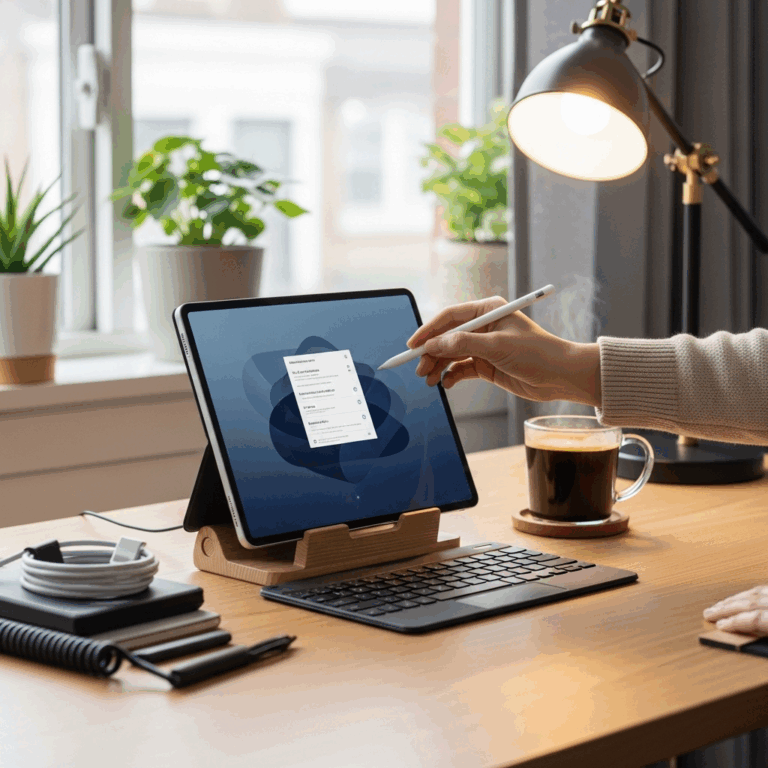
Your tablet’s screen is your window to the digital world, and when it comes to reading, its quality is paramount. A bright, clear, and responsive screen can transform your reading experience from mundane to magnificent. For the RCA Tablet 7 Voyager, a device often used for casual browsing and reading, a well-functioning screen is crucial.
Think about it: squinting at dim pixels, dealing with glare, or tapping your screen multiple times to turn a page can quickly zap the joy out of your favorite novel or article. Investing time, or a little bit of money, into upgrading or replacing your RCA Tablet 7 Voyager screen can bring back that crispness, that vibrant color, and that smooth touch response that makes digital reading a pleasure.
The Advantages of a Pristine RCA Tablet 7 Voyager Screen for Readers
- Reduced Eye Strain: A high-quality display with proper brightness and contrast settings can significantly reduce eye fatigue, especially during extended reading sessions.
- Enhanced Clarity and Detail: Sharp text and vibrant images make it easier to see fine print and appreciate illustrations, turning your reading into a more immersive experience.
- Improved Color Accuracy: For those who enjoy digital comics, magazines with colorful layouts, or even just visually appealing book covers, accurate colors make a big difference.
- Responsive Touch Controls: A smooth, lag-free touch experience allows for seamless page turns and navigation, keeping you in the flow of your reading.
- Better Viewing Angles: If you enjoy reading with a friend or partner, or simply like to shift your position, good viewing angles ensure the screen looks great from various perspectives.
- Reduced Glare: Many modern screens have anti-glare properties, which are a lifesaver when reading near windows or under bright artificial lights.
When is it Time for an RCA Tablet 7 Voyager Screen Upgrade?
It’s not always about a catastrophic crack. Sometimes, the need for an upgrade sneaks up on you:
- Visible Damage: Cracks, chips, spiderwebbing, or deep scratches are the most obvious indicators that your screen needs attention.
- Unresponsive Touchscreen: If your tablet doesn’t register your taps or swipes, or if it performs actions on its own (ghost touches), the digitizer layer of your screen might be failing.
- Display Issues: Dead pixels, discolored patches, flickering, vertical or horizontal lines, or a screen that’s too dim to see clearly signal a display hardware problem.
- Poor Brightness or Contrast: If you find yourself constantly maxing out the brightness and it’s still not enough, or if black areas appear grey, the backlight or LCD might be degrading.
- Significant Glare: Older screens or those with a glossy finish can become mirrors under light, making reading nearly impossible.
If any of these sound familiar, it’s time to seriously consider a screen upgrade or replacement for your RCA Tablet 7 Voyager. For a budget-friendly device like the Voyager, a screen replacement can often be a more economical choice than buying a brand-new tablet, especially if the rest of the device is functioning well.
Understanding Your RCA Tablet 7 Voyager Screen
Before diving into replacements, it’s helpful to understand what makes up your tablet’s screen. The RCA Tablet 7 Voyager typically features a capacitive touchscreen, which consists of a few key layers:
- The Outer Glass (Digitizer): This is the surface you touch. It contains a transparent conductive layer that senses the electrical field changes caused by your finger. This is what enables touch functionality.
- The LCD/LED Display: Behind the digitizer is the actual display panel. This layer creates the images you see – the pixels, colors, and brightness.
- The Backlight: For LCD screens, a backlight illuminates the display from behind, allowing you to see the image.
For many devices, particularly on budget-friendly models like the RCA Tablet 7 Voyager, the digitizer and the LCD panel are often bonded together as a single unit, commonly referred to as an “LCD Assembly” or “Screen Replacement Kit.” This simplifies the replacement process, as you’re dealing with one integral part rather than multiple separate components.
RCA Tablet 7 Voyager Specifics (General)
While exact hardware can vary slightly between revisions, the RCA Tablet 7 Voyager is generally known as an entry-level Android tablet. Its screen is typically a 7-inch display with a resolution that, while not Retina-level, is usually sufficient for everyday reading tasks. The key is that it should be functioning as intended.
When searching for replacement parts, you’ll often see listings specify “for RCA Voyager 7” or model numbers like “RCT6773W22B” (which is a common model for the Voyager 7). Make sure the part you order is compatible with your specific RCA Tablet 7 Voyager model.
Finding the Right RCA Tablet 7 Voyager Screen Replacement
This is where the internet shines! You have a few avenues for sourcing a replacement screen:
Online Marketplaces: Your Best Bet for Availability
Websites like Amazon, eBay, and specialized electronics parts retailers are your primary hunting grounds. When searching, use terms like:
- “RCA Tablet 7 Voyager screen replacement”
- “RCA Voyager 7 LCD digitizer”
- “RCT6773W22B screen replacement” (if you know your specific model number)
What to Look For in a Replacement Screen from a Seller:
- Compatibility: Double-check the product description to ensure it explicitly states compatibility with your RCA Tablet 7 Voyager model. Look for photos that match your tablet’s internal connections if possible.
- “With Frame” vs. “Without Frame”: Some screens come pre-attached to the plastic frame of the tablet. This can make installation easier but might be slightly more expensive. Others are just the glass/LCD assembly and require you to carefully detach and reattach it to your existing frame. For beginners, “with frame” is often simpler.
- Seller Reviews: Pay close attention to customer reviews. Look for feedback on product quality, accuracy of the listing, and successful installations by other buyers.
- Return Policy: A good seller will have a reasonable return policy in case the part is defective or not compatible.
- Price: Compare prices from different sellers. Remember, even on a budget device, you want a quality replacement that won’t fail prematurely.
Considerations for Purchase:
When buying online, you might also consider purchasing a repair kit alongside the screen. These kits often include necessary tools like small screwdrivers, plastic prying tools, adhesive strips, and sometimes even tools to remove adhesive.
Here’s a quick comparison of common purchasing scenarios:
| Option | Pros | Cons | Best For |
|---|---|---|---|
| Screen Assembly Only (Glass + LCD) | Generally cheaper. | Requires more skill and specialized tools to transfer to the old frame. Can be tricky to get the adhesive right. | Experienced DIYers looking to save a bit more money. |
| Screen Assembly with Frame | Significantly easier installation as it’s mostly a plug-and-play job. Often comes with pre-applied adhesive or a new adhesive strip. | Usually more expensive than just the assembly. | Beginners or those who want the simplest installation experience. |
| Full Tablet Repair Service | No DIY required. Done by professionals. | Most expensive option. Takes time for shipping and repair. | Those who are not comfortable with any DIY or have limited time. |
DIY Screen Replacement: A Step-by-Step Guide
Alright, let’s roll up our sleeves! Replacing the screen on your RCA Tablet 7 Voyager is achievable with patience. We’ll outline the general process. Please note: This is a general guide. Your specific tablet model might have slight variations. Always refer to a video tutorial specific to your RCA Voyager 7 model if possible.
Tools You’ll Likely Need:
- New RCA Tablet 7 Voyager Screen/Assembly: The part you purchased.
- Small Phillips Head Screwdriver: For internal screws.
- Plastic Prying Tools (Spudgers, Opening Picks): Essential for safely separating plastic parts without scratching or breaking them.
- Heat Gun or Hair Dryer: To soften the adhesive holding the old screen or back panel in place.
- Suction Cup: To lift the screen or back cover.
- Tweezers: For handling small screws and connectors.
- Thin Double-Sided Adhesive Strips/Tape: To secure the new screen.
- Anti-static Wrist Strap (Recommended): To protect sensitive components from static discharge.
- Gloves (Optional): To keep fingerprints off the new screen.
The Replacement Process:
- Power Down and Disconnect: Ensure your tablet is completely powered off. Remove any microSD cards or SIM cards if applicable.
- Heat the Edges: Gently use a heat gun or hair dryer on a low setting to warm the edges of the tablet. This softens the adhesive. Don’t overheat one spot; keep the heat moving.
- Pry Open the Back Cover or Screen: Using your suction cup, lift the screen or back panel slightly. Insert a thin plastic prying tool into the gap. Carefully slide the tool along the edges, gently separating the adhesive. Be patient and work your way around. If you are replacing just the screen and not the entire front assembly with frame, you’ll be prying off the broken screen first. If you bought an assembly with a frame, you’ll likely be prying off the back cover to access screws.
- Locate and Remove Screws: Once the back cover is off (or if the frame is attached to the screen you’re replacing), you’ll see internal screws holding the assembly in place. Use the appropriate screwdriver to remove them. Keep track of where each screw came from – they might be different sizes!
- Disconnect Battery (Crucial Safety Step): Before disconnecting any other cables, locate the battery connector and carefully disconnect it. This prevents short circuits.
- Disconnect Old Screen Cable: Identify the flat ribbon cable connecting the old screen’s digitizer and LCD to the tablet’s motherboard. Use a plastic prying tool to gently lift the retaining clip or pull the connector straight out.
- Remove Old Screen Assembly: With the cables disconnected and screws removed, you should be able to lift out the old screen assembly. If you bought a screen with a frame, you’ll likely be transferring the battery and motherboard into the new frame. If you bought just the glass/LCD, you’ll be carefully detaching that from the old frame.
- Prepare the New Screen: If your new screen didn’t come with adhesive, apply thin, double-sided adhesive strips precisely around the frame where the screen will sit. Remove any protective films from the new screen’s connector area.
- Connect the New Screen: Carefully align the ribbon cable of the new screen with its connector on the motherboard. Gently press it in until it clicks or the clip is secured.
- Reconnect Battery: Reconnect the battery cable.
- Test Before Sealing: This is a vital step! Before fully reassembling, power on the tablet. Check if the new screen displays correctly and if the touch functionality works across the entire surface. Test page turns, taps, and swipes.
- Reassemble: If the test is successful, power down the tablet again. Carefully put everything back together in reverse order – secure screws, snap the back cover or frame into place. Ensure all clips are engaged.
- Final Adhesive Seal: If you used adhesive strips, press firmly around the edges to ensure a good seal.
Tips for a Smoother Repair:
- Watch a Video: Seriously, search YouTube for “RCA Tablet 7 Voyager screen replacement” or your specific model number. Seeing it done makes a huge difference.
- Work on a Clean Surface: A well-lit, clean, and organized space prevents losing screws and contamination.
- Take Pictures: Document your disassembly process with photos. It’s a great reference for reassembly.
- Small Parts Tray: Use an egg carton or small containers to keep screws sorted by location.
- Patience is Key: Don’t force anything. If something feels stuck, recheck for hidden screws or adhesive.
Enhancing Your Reading Experience Post-Replacement
Once your RCA Tablet 7 Voyager screen is as good as new (or even better!), you can focus on optimizing your reading setup.
Software Tips for Better E-Reading:
- Adjust Screen Brightness: Find a comfortable level. Lower brightness conserves battery and reduces eye strain, especially at night. Most devices have an auto-brightness feature that adjusts to ambient light.
- Use Night Mode/Blue Light Filter: Many reading apps and Android settings offer a blue light filter or a “night mode.” This shifts the screen color towards warmer tones, which can be easier on the eyes before bed. The American Optometric Association1 notes that reducing blue light exposure before sleep can improve sleep quality.
- Font Size and Style: Don’t be afraid to adjust the font size and type. Most e-reader apps allow extensive customization. Larger, clearer fonts reduce the need to squint.
- Dark Mode: For some users, a dark theme with light text can be more comfortable, especially in low-light conditions.
- Dedicated E-Reader Apps: Utilize apps like Kindle, Google Play Books, Kobo, or Libby (for library books) which are specifically designed for extended reading and offer robust customization options.
Reading Material Considerations:
- Resolution of E-books: While your screen is now crisp, the original e-book file’s quality still matters. High-resolution PDFs or e-books with complex formatting will naturally look better on a good screen.
- Digital Magazines and Comics: These benefit the most from a vibrant, color-accurate display. Your upgraded screen will make these a joy to view.
- Web Articles: Reading articles directly from the web can sometimes be cluttered. Consider using browser extensions or reader modes to simplify the page.
The National Library Service for the Blind and Physically Handicapped (NLS), part of the Library of Congress, provides resources and reading materials for individuals with visual impairments, highlighting the importance of accessible and clear digital displays for all readers.
Troubleshooting Common Issues After Replacement
Even with careful work, sometimes things don’t go perfectly the first time. Here are a few common issues and solutions:
- Screen Won’t Turn On:
- Check Battery Connection: The most common culprit. Ensure the battery is securely reconnected.
- Check Screen Cable: Make sure the new screen’s ribbon cable is fully seated and the clip is secured.
- Faulty New Screen: Unfortunately, it’s possible the replacement screen is defective. Test it again if possible, and contact your seller.
- Touchscreen Not Working or Acting Erratically:
- Screen Cable: Again, ensure the ribbon cable is perfectly aligned and connected. A slightly misaligned cable can cause touch issues.
- Dust or Debris: Tiny particles can interfere with the digitizer. Make sure the connection points and screen edges are clean.
- Internal Connector: Check the connector on the motherboard itself for any damage.
- Faulty Digitizer: The digitizer part of your new screen might be faulty.
- Display Has Lines, Spots, or Color Issues:
- Screen Cable: A loose or damaged cable is often the cause.
- Pressure on the Screen:
Your tech guru in Sand City, CA, bringing you the latest insights and tips exclusively on mobile tablets. Dive into the world of sleek devices and stay ahead in the tablet game with my expert guidance. Your go-to source for all things tablet-related – let’s elevate your tech experience!