Have you just unpacked your shiny new iPad 10th generation? Exciting, right? But wait, there’s one important step before you dive into all the fun apps and games. You need to create an Apple ID! This might sound tricky, but it’s much easier than it seems.
Imagine your iPad as a treasure chest. It holds games, music, and movies just for you. But to unlock all these treasures, your Apple ID is the key. Every iPad user needs one. Did you know that millions of people use their Apple IDs every day? They help keep your information safe and make sharing with friends simple.
If you’ve never done this before, don’t worry! We will guide you through it step by step. Creating an Apple ID for your iPad 10th gen will help you access the App Store, iCloud, and much more. Are you ready to get started on your iPad journey? Let’s make your new device truly yours!

iPad 10Th Gen Apple Id Creation: A Step-By-Step Guide
Creating an Apple ID for your iPad 10th Gen is simple and essential. An Apple ID lets you download apps, games, and music. You can also back up important data and enjoy iCloud features. Did you know that without an Apple ID, you miss out on all the fun? To sign up, go to settings, tap “Sign in,” and choose “Create Apple ID.” Follow the prompts, and you’re ready to explore your iPad like never before!
Understanding Apple ID
Definition and purpose of an Apple ID. Importance of an Apple ID for iPad functionality.
An Apple ID is like a key to your iPad. It helps you access the App Store, iCloud, and more. Without this ID, many features won’t work. It is important for personalization and security too. You can store your apps, photos, and music safely. To use your iPad fully, you need an Apple ID. It simplifies your experience and helps keep everything organized.
What is the purpose of an Apple ID?
The purpose of an Apple ID is to allow you to access various services offered by Apple. This includes:
- App Store access: Download apps and games.
- iCloud storage: Save your photos and files safely.
- Syncing: Keep data in sync across devices.
Why is it important for iPad functionality?
A strong Apple ID ensures your iPad works well. It helps you:
- Use features like FaceTime and Messages.
- Get updates easily.
- Protect your personal information.
Preparing Your iPad 10th Gen
Checking software updates for compatibility. Ensuring internet connectivity.
First things first, let’s make sure your iPad is ready to roll! Start by checking for the latest software updates. Apple likes to keep things fresh and sprightly, just like a morning smoothie! Not having the latest version can cause hiccups when setting up your Apple ID.
Next, make sure you’re connected to a solid internet source. Wi-Fi with good strength is key; it’s like giving your iPad a nice energy drink. Without a stable connection, it might throw a tantrum, and no one wants that!
| Action | Status |
|---|---|
| Check Software Updates | Updated |
| Confirm Internet Connection | Connected |
Once you do these things, you’re all set for an exciting iPad adventure! Let the fun begin!
Steps to Create an Apple ID on iPad 10th Gen
Navigating to the settings app. Selecting “Create Apple ID” option.
To kick off your adventure with the iPad 10th Gen, find the Settings app. It looks like a little gear—easy to spot! Once you’re in, scan down for the option that says Create Apple ID. Click it, and voilà! You’re on your way to creating an Apple ID. Just follow the simple frames and say goodbye to forgetting passwords—hopefully, not as often as we forget where we put our socks!
| Step | Action |
|---|---|
| 1 | Open Settings app |
| 2 | Select “Create Apple ID” |
Providing Required Information
Entering personal information (name, birthdate, email). Choosing security questions and a strong password.
Now you’re ready to fill out your information. Start with your name, birthdate, and email. Make sure this information is correct. Next, choose security questions that only you can answer. This helps keep your account safe. Finally, create a strong password. Use letters, numbers, and symbols for better security. A good password is like a strong lock.
What information do I need to create an Apple ID?
You need to provide your name, birthdate, and email. It’s important that all this info is accurate to avoid issues later.
Tips for Strong Passwords
- Use at least 8 characters.
- Mix letters, numbers, and symbols.
- Avoid using common words.
Verifying Your Apple ID
Email verification process. Alternative verification options via phone number.
After you create your Apple ID, you need to verify it. This process ensures that your email is correct and safe. You can verify your email by clicking a link Apple sends you. If you can’t use email, you can also verify with your phone number. Here’s how:
- Receive a text message with a verification code.
- Enter the code in the Apple ID setup.
Verifying keeps your account secure. Remember, a verified Apple ID gives you access to all your favorite apps and features on the iPad!
How do I verify my Apple ID?
To verify your Apple ID, check your email for a verification link and click it. Alternatively, you can receive a code on your phone. If you enter that code, your ID gets verified!
Setting Up Two-Factor Authentication
Benefits of twofactor authentication for security. Steps to enable it on your new Apple ID.
Two-factor authentication is like having a superhero guard your Apple ID. It adds an extra layer of safety, making it hard for villains to sneak in. With this security measure, even if someone steals your password, they still can’t access your account without your second little secret. To enable it on your new Apple ID, follow these steps:
| Step | Action |
|---|---|
| 1 | Go to Settings on your iPad. |
| 2 | Tap on your name. |
| 3 | Select ‘Password & Security.’ |
| 4 | Turn on ‘Two-Factor Authentication.’ |
| 5 | Follow the prompts to finish! |
With just a few taps, you can turn your Apple ID into Fort Knox. Stay safe and keep those mischievous hackers at bay!
Troubleshooting Common Issues
Addressing problems during the creation process. Solutions for forgotten passwords or login issues.
When creating your Apple ID, some issues may pop up. Don’t worry! Here are quick ways to fix them:
- If you forget your password, use the “Forgot Password?” link on the login page.
- Make sure you check your internet connection. A weak or lost connection can cause problems.
- Double-check that you entered your email correctly. Typos can lead to confusion.
Sometimes things don’t go as planned, but you can solve these problems with a few simple steps. Stay calm and follow these tips to get back on track!
What should I do if I can’t remember my Apple ID password?
If you forget your password, you can reset it easily online. Simply click on “Forgot Password?” and follow the prompts. It’ll guide you through the reset process.
Managing Your Apple ID Settings
Exploring options for privacy and security. Updating personal information and payment methods.
Keeping your Apple ID settings in check is crucial for your safety. Privacy is like a superhero cape; you want it snug and ready to defend you! Start by exploring options for privacy and security in your settings. Don’t forget to update your personal information and payment methods, too. After all, outdated details can feel like wearing last year’s fashion. Check it all regularly to stay safe and save you from unexpected surprises!
| Task | Frequency |
|---|---|
| Review Privacy Settings | Every 3 months |
| Update Payment Method | As needed |
Importance of Linking Other Apple Devices
Benefits of having a unified Apple experience across devices. Steps to link additional devices to your Apple ID.
Linking your Apple devices is like creating a family reunion for your gadgets. When all your devices are connected through your Apple ID, you enjoy a unified experience. Imagine starting a movie on your iPad and finishing it on your Mac. Cool, right?
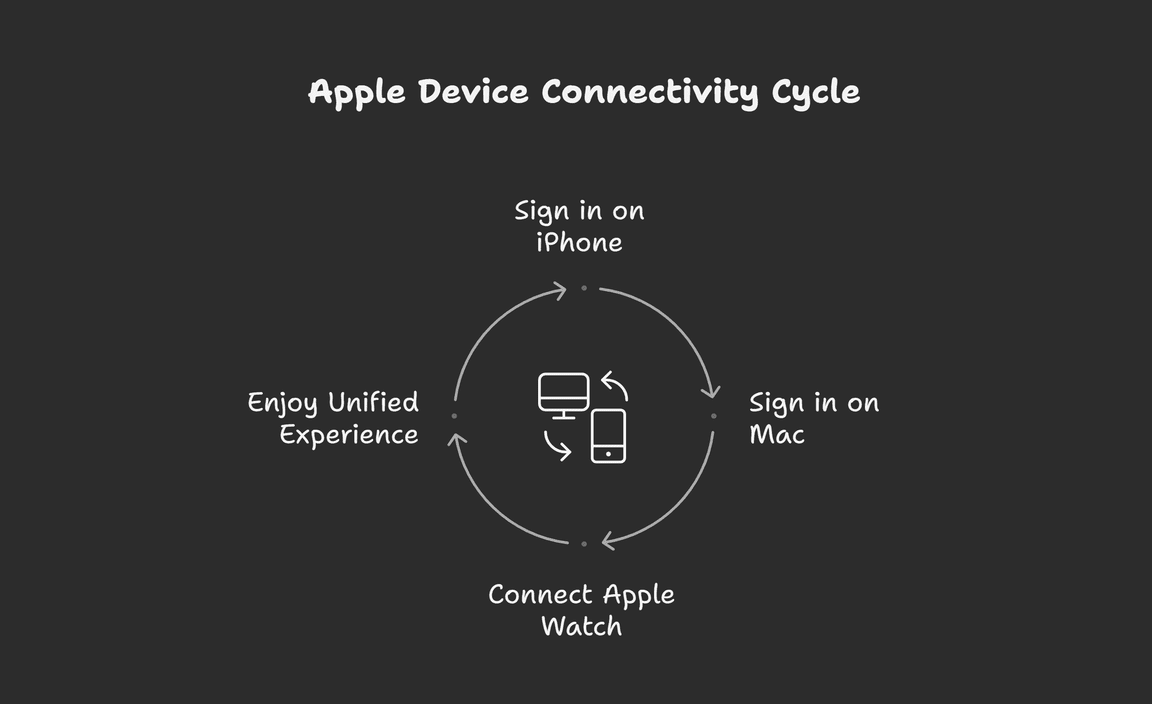
Here’s how to link those devices:
| Device Type | Steps to Link |
|---|---|
| iPhone | Go to Settings > Tap your name > Sign in. |
| Mac | Open System Preferences > Click Apple ID > Sign in. |
| Apple Watch | Open the Watch app > Tap My Watch > Connect to your Apple ID. |
By connecting everything, you get smooth syncing and access to iCloud. Remember, “A happy device is a connected device!”
Conclusion
In summary, creating an Apple ID for your iPad 10th Gen is simple and important. It unlocks features like the App Store and iCloud. You’ll need an email address and some personal info. If you haven’t created one yet, now is the time! Explore more resources or tutorials to help you set up your iPad today. Happy exploring!
FAQs
How Do I Create An Apple Id Using The Ipad 10Th Generation During Setup?
To create an Apple ID on your iPad 10th generation, start by turning on your iPad. Follow the setup steps on the screen. When you see “Create Apple ID,” tap it. Enter your name, birthday, and email. Choose a password, then follow the instructions to finish. Now, you have your Apple ID!
What Are The Steps To Create An Apple Id From The App Store On My Ipad 10Th Generation?
To create an Apple ID from the App Store on your iPad, first, open the App Store app. Then, tap on your profile picture at the top right. Next, select “Create Apple ID.” Fill in your information, like your name and email. Finally, follow the steps to finish setting up your account.
Can I Use My Email Address To Create A New Apple Id On My Ipad 10Th Generation, And What Format Should It Be In?
Yes, you can use your email address to make a new Apple ID on your iPad 10th generation. Your email should look like this: “[email protected].” Make sure it has an “@” symbol and ends with “.com,” “.net,” or “.org.” Just follow the steps on your iPad to set it up!
What Should I Do If I Forget The Password For My Apple Id Created On The Ipad 10Th Generation?
If you forget your Apple ID password, don’t worry! First, go to the Apple ID website. Click on “Forgot Apple ID or password?” Follow the steps to reset it. You might need to answer some questions or get a code sent to your email or phone. Once you reset your password, you can use your Apple ID again!
Are There Any Age Restrictions For Creating An Apple Id On The Ipad 10Th Generation, And What Does That Mean For Users Under 1
Yes, there are age rules for making an Apple ID. You must be at least 13 years old. If you are younger than that, you can’t make your own account. But, a parent can create a special account for you. This helps keep you safe while using the iPad.
Resource
-
Apple ID Security Tips: https://support.apple.com/en-us/HT201303
-
Why Two-Factor Authentication Matters: https://www.consumer.ftc.gov/articles/how-recognize-and-avoid-phishing-scams
-
Creating Strong Passwords: https://www.cyber.gov.au/acsc/view-all-content/guidance-materials/creating-strong-passwords
-
Family Sharing and Apple ID for Kids: https://www.commonsensemedia.org/articles/how-to-set-up-an-apple-id-for-a-child
Your tech guru in Sand City, CA, bringing you the latest insights and tips exclusively on mobile tablets. Dive into the world of sleek devices and stay ahead in the tablet game with my expert guidance. Your go-to source for all things tablet-related – let’s elevate your tech experience!