Get your RCA Tablet Apollo ready for your child in no time! This guide walks you through a simple, step-by-step setup process, ensuring a safe and fun digital experience for kids. We’ll cover everything from initial power-on to essential safety settings, making tablet time a breeze.
Welcome to the exciting world of tablets for your little ones! If you’ve just unboxed a new RCA Tablet Apollo, you’re probably eager to get it up and running for your child. It’s completely normal to feel a little daunted by the setup process, especially when it comes to ensuring it’s safe and suitable for young users. But don’t worry! Here at Tabletzoo, we break down everything you need to know into easy, manageable steps. We’ll guide you through the initial setup and highlight the key features that make the RCA Tablet Apollo a fantastic choice for kids. Get ready for smiles and happy screen time!
RCA Tablet Apollo: A Quick Look for Parents

Before diving into the setup, it’s good to know what makes the RCA Tablet Apollo a popular choice for families. These tablets are designed to be budget-friendly, durable, and user-friendly, making them ideal for children. They offer a good balance of features for learning, playing, and staying connected.
Affordability: RCA tablets are known for their competitive pricing, making them accessible for many families.
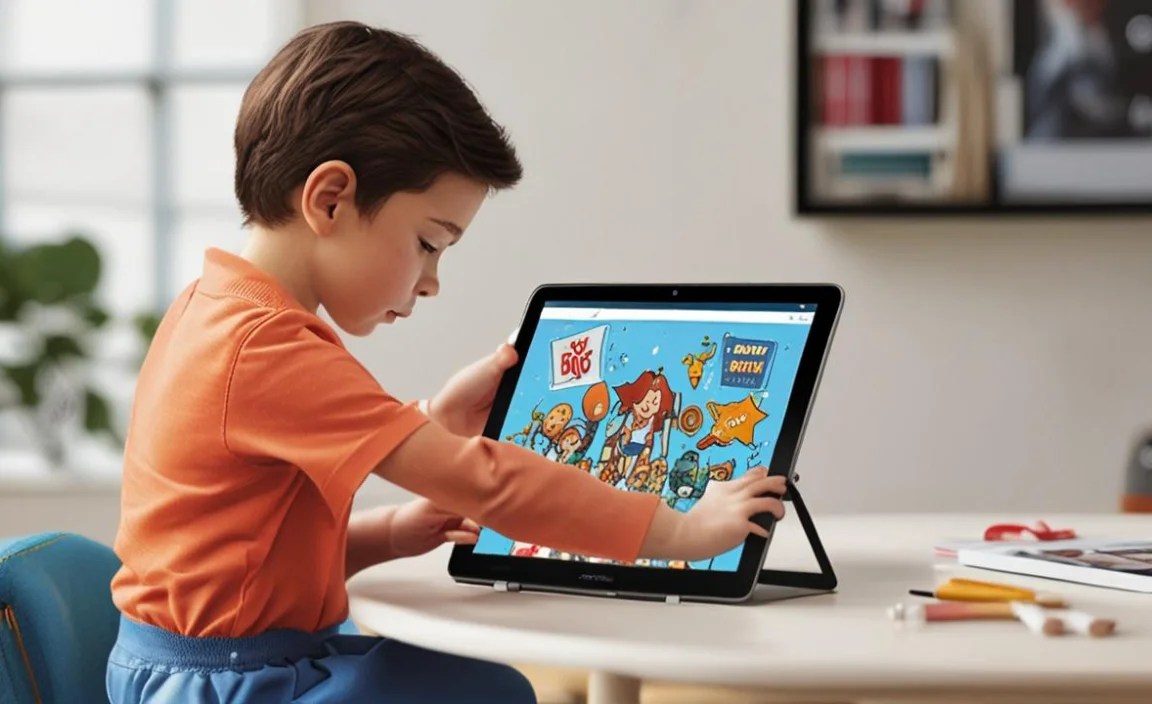
Kid-Friendly Design (with supervision): While not specifically a “kid’s tablet” out of the box, its screen size and touch interface are intuitive for children. With the right settings and apps, it can become a great digital playground.
Decent Performance for Essentials: For everyday tasks like browsing educational content, playing simple games, and watching videos, the Apollo generally performs well.
Expandable Storage: Many RCA models come with microSD card slots, allowing you to add more space for apps, photos, and videos – a big plus for families!
Getting Started: What You’ll Need

Setting up your RCA Tablet Apollo is straightforward. Here’s a quick checklist to make the process smooth:
Your RCA Tablet Apollo: Make sure it’s charged or plug it in.
Wi-Fi Network Name and Password: You’ll need this to connect to the internet.
Google Account: If you don’t have one, you’ll need to create one. This is essential for downloading apps and accessing many features.
Patience and a smile! Ready to make this a fun experience for your child.
Step-by-Step RCA Tablet Apollo Setup for Kids
Let’s get that tablet ready for some fun and learning! Follow these steps carefully.
Step 1: Power On and Initial Language Selection
1. Find the Power Button: It’s usually located on the side or top edge of the tablet. Press and hold it for a few seconds until the RCA logo appears.
2. Welcome Screen: The tablet will boot up, and you’ll see a “Welcome” screen.
3. Select Your Language: Tap on your preferred language (e.g., English) from the list. This sets the primary language for the tablet.
4. Tap ‘Next’ or ‘Start’: Follow the on-screen prompts to proceed.
Step 2: Connect to Wi-Fi
1. Choose Your Network: You’ll be prompted to connect to a Wi-Fi network. Select your home Wi-Fi network from the list of available networks.
2. Enter Password: Carefully type in your Wi-Fi password.
3. Connect: Tap “Connect” or “Join.” The tablet will confirm if the connection is successful. If it doesn’t connect, double-check your password and try again. A stable internet connection is crucial for downloading apps and updates.
Step 3: Sign in with or Create a Google Account
1. Google Services: You’ll see a screen asking you to sign in to your Google Account or create a new one.
2. Existing Account: If you already have a Gmail address and password, enter them here and tap “Next.”
3. New Account: If you need a new Google Account, tap “Create account.” Follow the on-screen instructions to set up a new account. You’ll need to provide a name, birthday, and choose a username and password.
Important for Kids: For younger children, it’s often best for a parent to create a Google Account with their own information or use the Family Link features (more on that later) to manage a child’s account.
4. Google Services Agreements: You’ll be asked to agree to Google’s terms of service and privacy policy. Read through them (or at least skim!) and tap “Agree” to continue.
Step 4: Set Up Parental Controls and Family Link
This is arguably the MOST important step for setting up a tablet for kids. Google’s Family Link is an excellent tool.
1. Google Family Link Prompt: During the setup, you might see an option related to Family Link. If not, don’t worry, you can set it up later.
2. What is Family Link? Google Family Link allows you to create a Google Account for your child under 13 (or your country’s age limit) and manage their device usage from your own phone or tablet.
3. Benefits for Kids’ Tablets:
App Approvals: You can approve or block apps your child wants to download from the Google Play Store.
Screen Time Limits: Set daily time limits for tablet use.
Device Locking: Lock the device remotely when it’s time for a break.
Location Tracking: See your child’s device location.
Content Filtering: Help filter content on Google Search and Chrome.
4. Setting Up Family Link (If prompted):
Follow the on-screen prompts. You’ll likely need to download the Family Link app on your own smartphone (available for Android and iOS).
You’ll then link your child’s new or existing Google Account to your parent account within the Family Link app.
5. Setting Up Family Link (If NOT prompted during initial setup):
Once your tablet is set up, open the Settings app.
Scroll down and look for Google.
Tap on Parental controls.
Tap Get started and follow the instructions to set up Family Link. You’ll be guided to create or manage a child’s account.
You can also find more information on Google’s official Family Link website.
Step 5: Set Up Security (PIN, Pattern, or Password)
1. Protecting the Device: You’ll be asked to set up a screen lock for the tablet. This prevents unauthorized access if the tablet is lost or if another person picks it up.
2. Choose a Method: You can choose from:
PIN: A numeric code (recommended for simplicity).
Pattern: Drawing a pattern connecting dots.
Password: A more complex alphanumeric code.
3. Confirm Your Choice: Enter your chosen PIN, pattern, or password again to confirm.
4. Backup Method (Optional but Recommended): Some tablets offer security questions or a backup password in case you forget your primary lock.
Step 6: Restore or Set Up as New
1. Copy Apps & Data: The tablet will ask if you want to copy apps and data from another device or set it up as new.
Set Up as New: This is usually the best option for a child’s tablet to ensure a clean slate, free from any old apps or settings that aren’t kid-appropriate.
Copy from Device: If you’re moving from another Android tablet and want to transfer data, you can do so here.
2. Google Assistant and Other Services: You’ll likely see prompts to set up Google Assistant, Google Photos, and other Google services. You can configure these according to your preferences. For kids, you might choose to disable certain features or access.
Step 7: Tablet Personalization for Kids
Once the main setup is complete, you can make the tablet even more child-friendly.
1. Google Play Store Access: Open the Google Play Store app.
2. Family Link App Approval: IMPORTANT: If you have Family Link set up, your child will need your approval for every app they want to download.
3. Download Kid-Friendly Apps: Search for educational games, creative apps, and entertainment suitable for your child’s age and interests. Look for apps known for being safe and ad-free where possible.
Examples: PBS KIDS Games, Khan Academy Kids, Toca Boca apps, Endless Alphabet.
4. Organize Apps: Create folders on the home screen to organize apps by category (e.g., “Learning,” “Games,” “Creative”). This makes it easier for kids to find what they’re looking for.
5. Adjust Font Size and Display: In the Settings app, you can adjust the font size and display settings to make text easier to read for younger eyes.
6. Screen Brightness: Ensure the screen brightness is set comfortably for your child’s eyes, especially if they’ll be using it in varying light conditions.
Essential RCA Tablet Apollo Features for Kids
Let’s explore some features that make the RCA Tablet Apollo a solid choice for your child, with the right setup.
The RCA Tablet Apollo is a versatile device that can be transformed into a fantastic learning and entertainment tool for children. Here are some key features and how to leverage them:
1. Google Play Store
This is your gateway to a universe of apps. With Family Link, you control what your child can access. Focus on educational apps that teach reading, math, and science, or creative apps that encourage drawing and storytelling.
- Educational Apps: Search for apps like Khan Academy Kids, ABCmouse, or Duolingo ABC.
- Creative Apps: Explore Drawing apps (e.g., ibis Paint X for older kids, simple drawing apps for younger ones), Story Creator apps, or LEGO apps.
- Games: Look for age-appropriate puzzle games, logic games, or simple arcade games.
2. Camera and Video
Most RCA tablets come with front and rear cameras. Encourage your child’s creativity by letting them take photos and videos of their surroundings, toys, or artwork. These can then be used in creative projects or shared (with parental supervision).
3. Internet Browsing (with caution!)
The tablet includes a web browser (usually Chrome). This is where parental controls are critical. Using Family Link, you can:
- Filter SafeSearch: Ensure Google Search filters out explicit results.
- Block Specific Websites: Prevent access to sites you deem inappropriate.
- Supervised Browsing: Monitor and manage approved websites.
- Educational Websites: Guide your child to safe and enriching websites like NASA Kids’ Club or National Geographic Kids.
4. Storage Options
The RCA Tablet Apollo often comes with limited internal storage. This is where a microSD card can be a lifesaver. Investing in a decent-sized microSD card (e.g., 64GB or 128GB) means you can store more apps, games, photos, and videos without cluttering the device’s main memory.
- Check Storage Requirements: Some apps require significant storage space.
- Expandable Memory: Look for the microSD card slot (usually a small tray on the side).
- Transferring Files: You can often move apps or media between internal storage and the SD card via the tablet’s settings.
5. Battery Life
Battery life on budget tablets can vary. Ensure you charge the tablet fully before your child uses it, especially for longer sessions. Consider purchasing a portable power bank if your child uses the tablet frequently on the go.
RCA Tablet Apollo Specifications Comparison (Typical Models)
While specifications can vary slightly between different RCA Apollo models, here’s a general idea of what you might find and why it matters for kids.
| Feature | Typical Specification | Why It Matters for Kids |
|---|---|---|
| Display Size | 7 to 10 inches | Larger screens are easier for young children to see and interact with, reducing frustration. |
| Processor | Quad-core (e.g., MediaTek, Rockchip) | A decent processor ensures smooth performance for basic apps and games, preventing lag that can frustrate kids. |
| RAM | 1GB – 2GB | More RAM means the tablet can handle more tasks simultaneously. 2GB is generally better for smoother app multitasking. |
| Storage (Internal) | 16GB – 32GB | This can fill up quickly with apps and media. An SD card slot is highly recommended. |
| Connectivity | Wi-Fi, Bluetooth | Wi-Fi is essential for online content and app downloads. Bluetooth can be used for wireless headphones or speakers. |
| Battery | 3,000 – 5,000 mAh | Affects how long the tablet can be used between charges. Aim for a battery that can last at least 4-6 hours of active use. |
| Operating System | Android (various versions) | Determines the interface and compatibility with apps. Newer Android versions offer better security and features. |
Tips for Making the RCA Tablet Apollo a Safe Haven for Kids
Beyond the initial setup, ongoing management is key to a positive digital experience.
Regularly Review Apps: Even with Family Link, periodically check the apps your child is using. Are they still age-appropriate? Are they educational or entertaining?
Talk About Online Safety: Use this as an opportunity to teach your child about being safe online. Explain what personal information is, why they shouldn’t share it, and what to do if they see something that makes them uncomfortable. Resources from Safer Internet Day can be helpful.
Set Boundaries: Establish clear rules for when, where, and how long the tablet can be used. This helps prevent overuse and ensures a balance with other activities.
Physical Safety: Ensure the tablet is used in a safe environment where it won’t be dropped or damaged, and where adult supervision is possible.
Keep Software Updated: Regularly check for and install software updates for the operating system and apps. These often include important security patches.
Troubleshooting Common Setup Issues
Occasionally, things don’t go exactly as planned. Here are a few common hiccups and how to fix them.
Wi-Fi Not Connecting:
Double-check your Wi-Fi password for typos.
Restart your router and the tablet.
Ensure you are within range of your Wi-Fi signal.
Try connecting to another Wi-Fi network if possible (e.g., a friend’s house) to see if the issue is with your network.
Google Account Issues:
If you forgot your password, use the “Forgot password” option on the Google sign-in screen.
Ensure you have a stable internet connection when creating or signing into the account.
Tablet Freezing or Slow:
Try restarting the tablet by holding the power button.
If it’s consistently slow, close unnecessary apps running in the background.
Consider uninstalling apps your child doesn’t use or that are known to be resource-intensive.
A factory reset might be necessary as a last resort for persistent performance issues (all data will be erased).
Family Link Not Enabling:
Ensure both your parent device and the child’s tablet are running the latest software updates.
Make sure you are signed into the correct Google account on your parent device.
* Refer to Google’s Family Link Help Center for detailed troubleshooting.
Frequently Asked Questions (FAQ)
Q1: How do I create a Google Account specifically for my child using Family Link?
A1: During the tablet setup, when prompted for a Google Account, choose to create a new one. If it doesn’t explicitly mention Family Link, first set up the tablet with your own Google Account (or skip this step if asked). Then, go to Settings > Google > Parental controls > Get started on the tablet and follow the prompts to add your child’s account and manage it. You’ll need the Family Link app on your own phone for this.
Q2: Can I install apps without Google Play Store?
A
Your tech guru in Sand City, CA, bringing you the latest insights and tips exclusively on mobile tablets. Dive into the world of sleek devices and stay ahead in the tablet game with my expert guidance. Your go-to source for all things tablet-related – let’s elevate your tech experience!